
目录 | Table of Contents
Kubernetes are very useful for managing servers at a scale. Someone might ask, I don't have more than 3 servers to manage. Should I go for Kubernetes, or could we use Docker or Docker Compose?
In the past several years, I would suggest we could just use Docker Compose. But seeing that more mature and lightweight Kubernetes solutions appeared, I changed my mind and started using Kubernetes if I had more than two machines to manage (or even one machine). I think K3s is a good distribution of Kubernetes which has a relatively small footprint in case you have a small cluster. Comparing it to running the container naked using Docker compose, using K3s will require you to run a few extra Kubernetes administrative processes. That is about 150 MB of extra memory, which should not be a big deal for most IoT devices (I guess).
We are using Kubernetes not just for managing a "huge" cluster but to have verifiable deployment across development and deployment. In our development environment, we downscale the cluster to 1. And in the production or staging environment, we could upscale the deployment if necessary.
This article will describe how to install a light weighted version of Kubernetes -- K3s in two nodes and with IPv6 enabled.
We will need 3 (virtual) machines for this demo.
- One machine runs the "master" node (control panel node). It runs the scheduler and API server. All the commands need to communicate to this node.
- One machine is the "slave" node (worker node). It does not run the scheduler, which has a smaller footprint than the control panel node.
- The third machine is your own machine. We need to install some tools (i.e.
kubectl,k9s,helm) on our own machine to help us manage the cluster.
Control Panel Node
First, it would be nice to set the server's hostname so we can have an easy-to-call node name.
# Write string cloud to the hostname file
echo "cloud" | sudo tee /etc/hostname > /dev/null
# Apply the changes
sudo hostname -F /etc/hostname
Installing K3s is very simple, but the default command provided by the official website is usually not enough.
curl -sfL https://get.k3s.io | sh -
I usually disable servicelb and traefik (we could install metallb if installing K3s in a bare metal machine). For the underlying network, it would be nice to enable WireGuard to protect peer-to-peer communication, especially if your nodes are not in a secured LAN. It would also be nice to enable dual-stack support.
export IPV4=123.123.123.123
export IPV6=2607:5300:60::123
curl -sfL https://get.k3s.io | INSTALL_K3S_EXEC="--disable servicelb --flannel-backend=wireguard-native --disable traefik --node-ip $IPV4,$IPV6 --cluster-cidr 10.42.0.0/16,2001:cafe:42:0::/56 --service-cidr 10.43.0.0/16,2001:cafe:42:1::/112" sh -
If IPv6 is not available in your network, then we should better not activate IPv6 using the following commands. It is important to get the correct public IP address so the worker node can join your cluster.
export IPV4=123.123.123.123
curl -sfL https://get.k3s.io | INSTALL_K3S_EXEC="--disable servicelb --flannel-backend=wireguard-native --disable traefik --node-ip $IPV4 --cluster-cidr 10.42.0.0/16 --service-cidr 10.43.0.0/16" sh -
Figuring out the correct IP address is important. Because we need to use this IP address to control the control panel, and other nodes need to communicate to that IP address. In case you have all the nodes within a LAN, you need to find the IP within the LAN (usually behind NAT). You could use ip a to check the IP address. If you want other nodes out off the LAN to join the cluster, you may also need to set up port forwarding or DMZ on the router. For security reasons, I would rather recommend getting a VPS from Linode, Digital Ocean or whatever to host the control panel.
After successfully running the command above, it should print out the token for joining the Kubernetes cluster. And it is also available in /var/lib/rancher/k3s/server/node-token
sudo cat /var/lib/rancher/k3s/server/node-token
To access the cluster, we need to download the access key from this control panel node to your own machine (Later, we will install kubectl and other tools on our own machine)
sudo cat /etc/rancher/k3s/k3s.yaml
Worker Node
We use the token obtained from the control panel node on the worker node to install K3s on the worker node. In most cases, we don't need to specify other parameters. We need to provide the worker node with the node token and the location of the control panel node.
curl -sfL https://get.k3s.io | K3S_URL=https://YOUR_CONTROL_PANEL:6443 K3S_TOKEN="NODE_TOKEN" sh -
Extra Steps for Raspberry Pi
We need to change the booting configuration on Pi to enable cgroup. Add the following parameters to /boot/cmdline.txt, then reboot the device.
cgroup_memory=1 cgroup_enable=memory
How to Manage the Cluster?
These three tools are the minimal tools for managing the cluster. To access the cluster, you need to download /etc/rancher/k3s/k3s.yaml from the control panel node and save it to ~/.kube/config to your own machine.
Install Kubectl
This is the "official" tool for managing Kubernetes
https://kubernetes.io/docs/tasks/tools/install-kubectl-linux/
kubectl get nodes # list all the nodes
kubectl get pods # list all the pods
kubectl apply -f ./deployment.yml # apply configuration
kubectl delete -f ./deployment.yml # remove configuration
kubectl taint nodes --all node-role.kubernetes.io/master:NoSchedule-
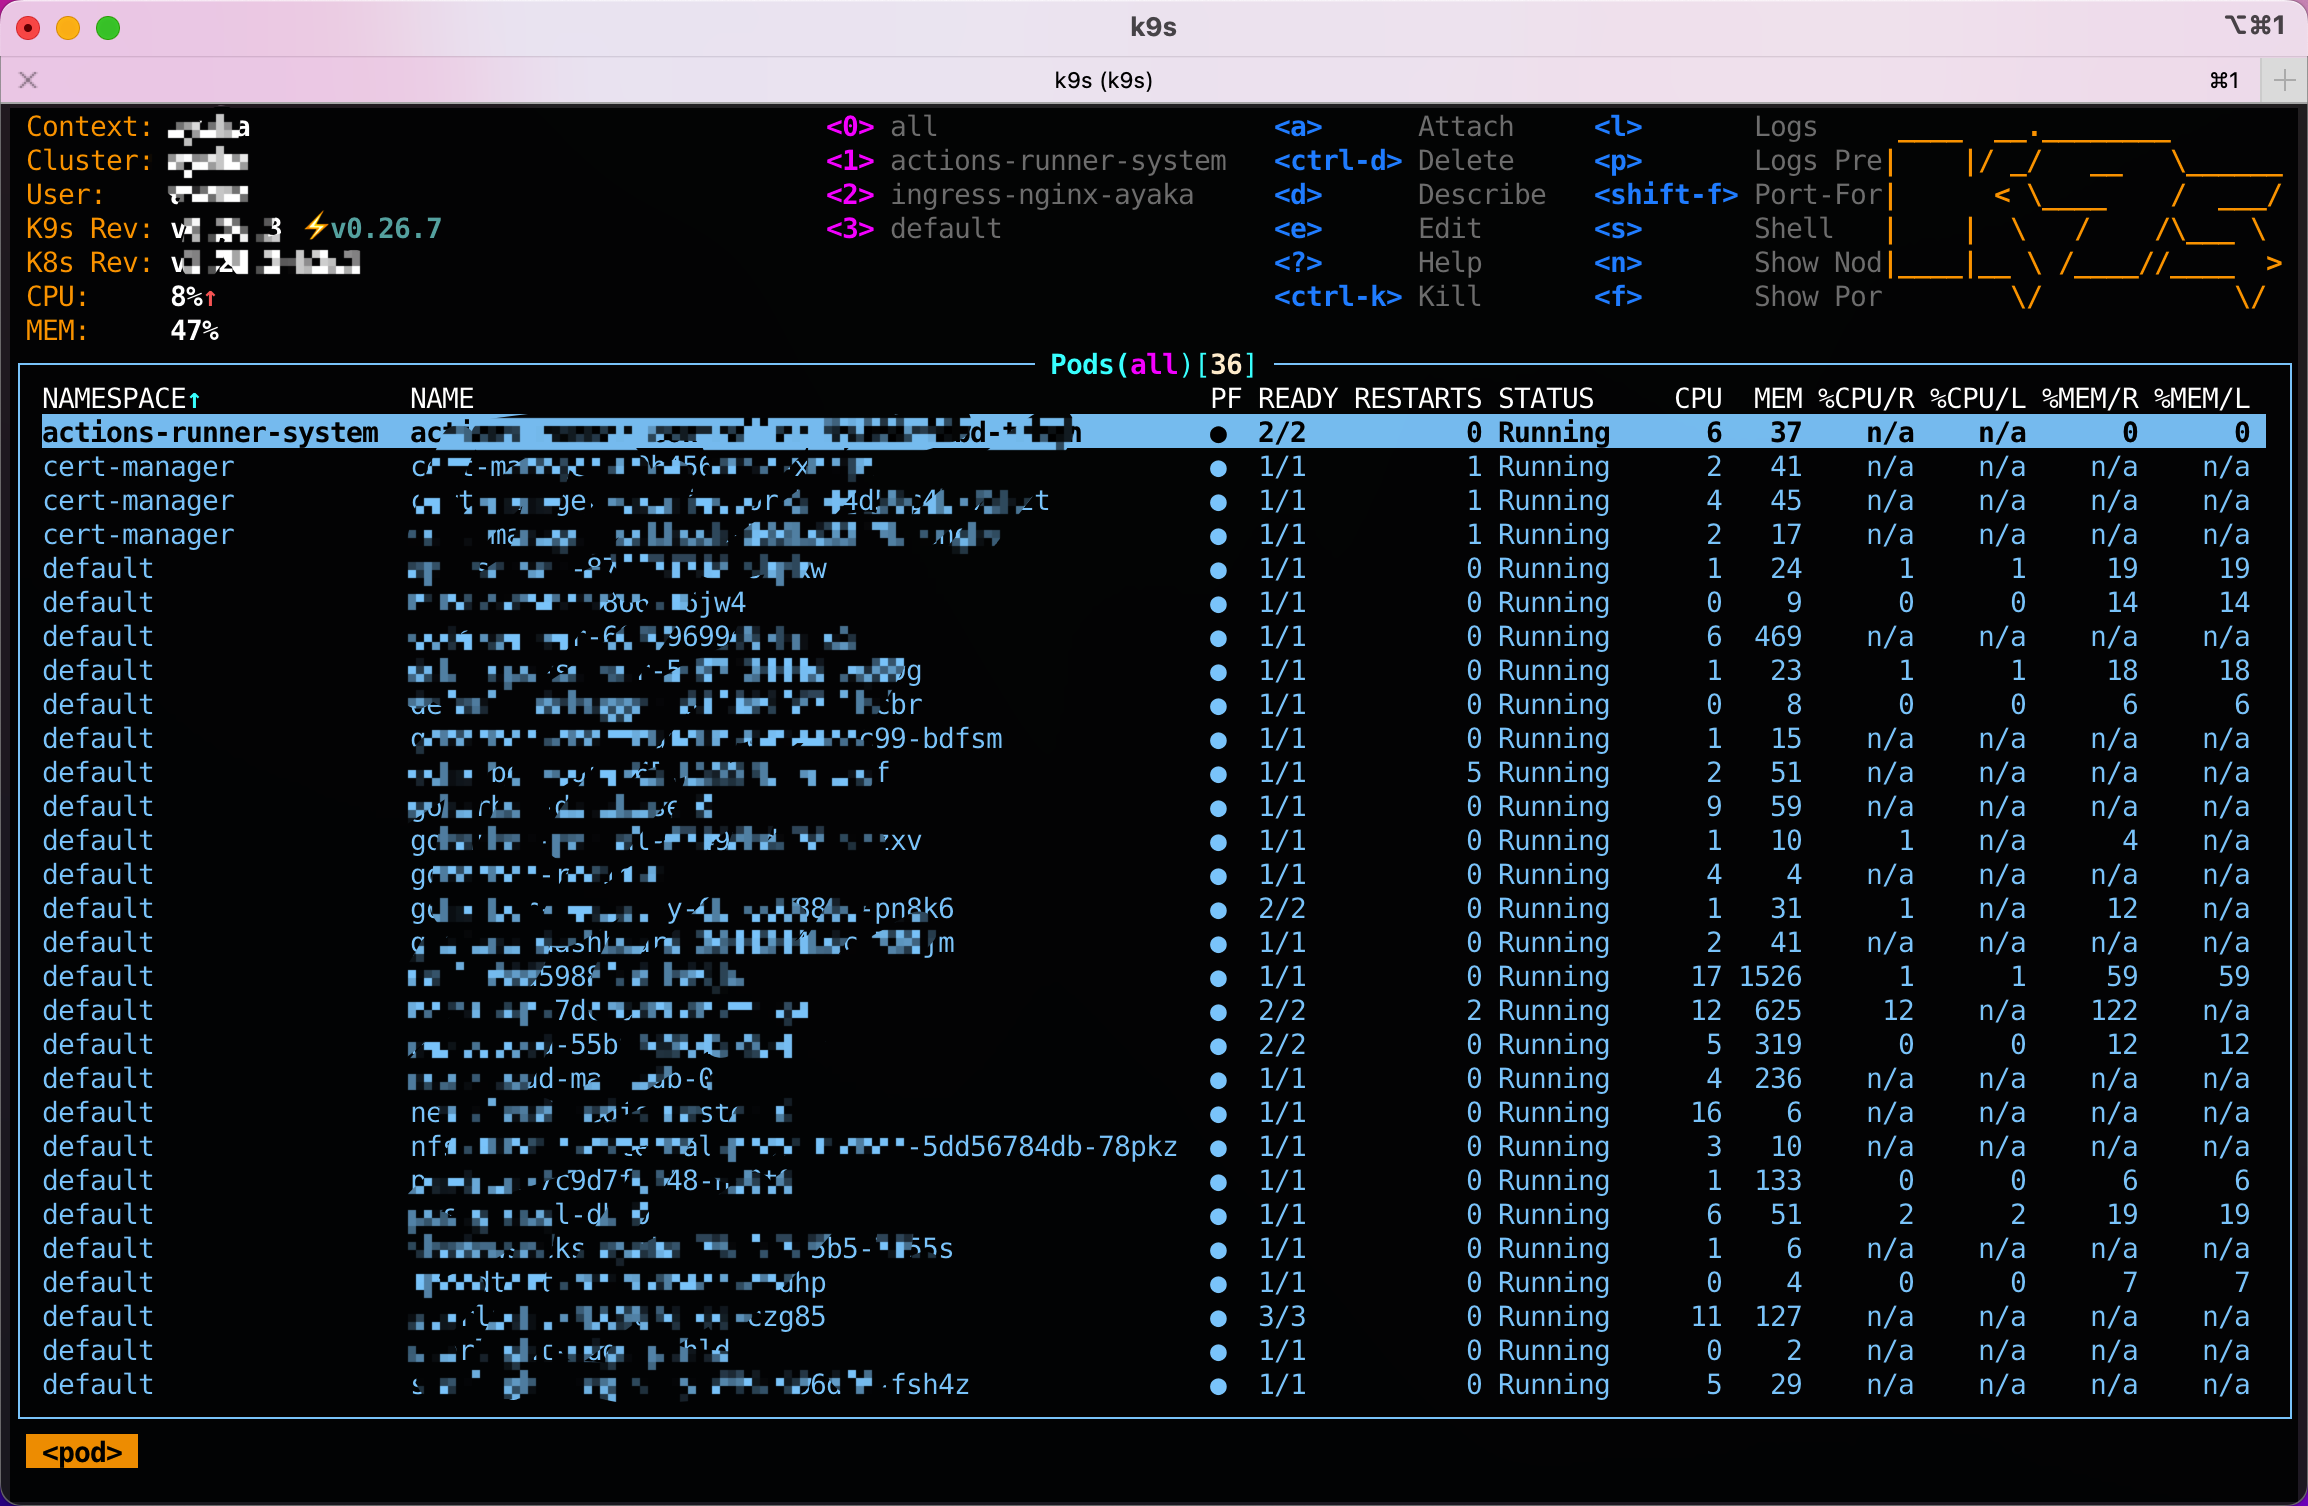
Install K9s
K9s is a very helpful and beautiful command line tool for managing Kubernetes clusters. What makes it the best is that you could have Shell access to a container via its interface.
https://k9scli.io/topics/install/
Install Helm
This is similar to the Docker Compose for Kubernetes.
https://helm.sh/docs/intro/install/
For more information, please refer to https://docs.k3s.io/quick-start
